How to Hang a Hammock
Whether you’re relaxing at the beach, setting up camp in the middle of a forest, or creating a calming space in your own home, hammocks provide the perfect way to soak up the more peaceful moments of your life. Getting that perfect “hang,” however, is essential in stretching out and relaxing in true comfort. Incorrectly suspending your hammock may not only result in a poor night’s rest, but even some genuine back pain.
Finding that ‘sweet spot’ has been a little daunting to some people at first. They’ve tried unsuccessfully once or twice and then tossed their hammock onto a shelf in their garage thinking it wasn’t for them. Whether you’ve already tried, or have just picked up this fun piece of gear, I believe if you keep a few things in mind you’ll be able get a perfect hang.
In this article I’d like to show you just how easy it is to achieve the relaxation you are hoping to find as you unfurl your hammock!
Indoors
Adding a hammock indoors can transform ordinary living space into a room where dreams swing freely. Perch yourself beside a window, create a nook for inspiration, or instantly fashion your new guest bedroom. With a few simple tools and some hardware you can unravel your imagination from its stuff sack!
The first step to bringing the outdoors inside is to locate two anchor points about 10-15 feet apart in the room. These can be diagonal or straight across from each other.
 The anchor points must be weight-bearing, like wall studs that can easily be located with a stud-finder (check your local hardware store). After you’ve located two studs, drill a pilot hole through the wall and into each stud; it must be a smaller diameter hole that the lag bolt. Keep in mind that the width of your room and the length of your hammock will factor in to decide how high to hang your hammock. This link will take you to an awesome calculator that can help you decide how high to hang it.
After you’ve drilled your holes, gently turn in a case-hardened “eye bolt.” Attach your hammock carabiners to the eyebolts and adjust for height. You should now be able to sink into relaxation in your own home. You’ll never be hampered from ‘hanging’ by bad weather again!
 My hammock gently sways above my desk in my home office. It’s the perfect place to retreat for an afternoon snooze or to catch up on some reading. It can also be easily detached from the anchors and stuffed into my backpack for another outdoor adventure.
Outside
As nice as it is to gently rock in your hammock by a window, there’s nothing like catching a breeze or feeling the warmth of the sun from your hammock in the great out-of-doors. Few moments rival catching a glimpse of the Milky Way as you lay cocooned between two trees in the distant outback on a warm summer’s night. Most hammocks were designed with just this purpose in mind.
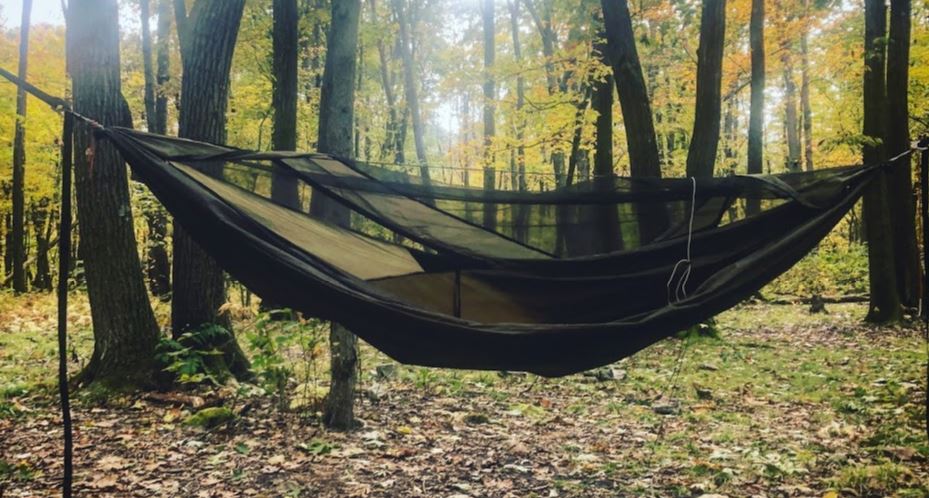
 The most common method of hanging outdoors is between two trees using the tree-friendly, 1-inch webbing. First, take a moment to scout out your area. Never hang your hammock on a standing dead tree. And, always remember to look up, as there could be dead branches reaching out above you. A sudden, summer-night storm can shake things up!
The two trees you’ve selected should be about 10-15 feet apart (about 3-4 long paces). Begin by attaching your hammock’s suspension to each tree. A good rule of thumb is to keep the strap wrapped around the tree slightly above eye level (your rain tarp line will go below the hammock straps). Repeat this step on the other tree with the remaining strap. My personal preference is to keep the foot end a few inches above the head end. This prevents me from sliding down toward my feet during the night. I also find that it makes for a more comfortable hang.
Keep in mind that most suspension systems were designed for trees spaced 12-15 feet apart, and for trees less than a foot in diameter. However, not all trees are spaced evenly, or retain their thin shape! A longer hang, or using a thicker tree may require longer than usual suspension system. I always carry 550 paracord with me just in case I have to reach farther.
 As you unfurl your hammock from the stuff sack take care not to drag it across the ground as it may get dirty or even become snagged on rocks or twigs. Make sure both straps and your suspension system are secure before carefully sitting into the hammock to test it.
If you’re just relaxing for a few hours it may not matter at what angle you’re hanging your hammock. However, if you’re planning on spending the night in it you will want to take a few moments to make sure you’ve got the perfect angle. This is essential for a good night’s rest. The general rule is that the strap line to the hammock should be at a 30° angle from the tree. But, don’t let this intimidate you! It’s not hard to achieve the right angle with a little practice and patience!
 To get the perfect angle first take a few steps back and look at your hammock after you have initially hung it. It should resemble a “slight smile.” The corners of the “mouth” should not be too high, and there should not be a deep sag in the middle. If this is the case, then you have exceeded the 30° angle. Simply adjust your hammock’s suspension system to draw each end of the hammock closer to the tree. If you still aren’t satisfied with the “smile” of your hammock, the next step is to slightly lower each end of the strap around the tree. By alternating between adjusting each end closer to the tree, and lowering the strap around the tree, you should be able to achieve the desired “smile” or angle.
 If, on the other hand, you step back from your hammock and see a “grimace” (flatline) instead of a smile, then your angle is too low. Simply lower each end of the hammock a few inches at a time, and/or slightly raise the wrap around the tree (if in reach). It’s always best to lie down in it for a bit and see how it feels before making the next adjustment.
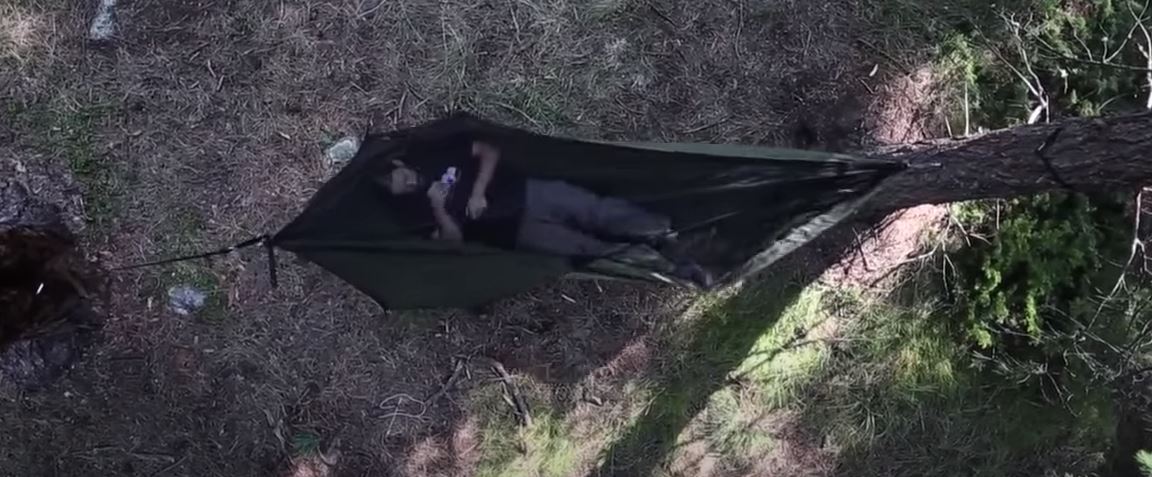
One of the most common misconceptions of sleeping in a hammock is that you will feel as if you’re sleeping like a banana. Of course, it would be extremely uncomfortable to have both of your legs and head curved upward while you’re trying to sleep. But, that’s not the way it’s done. Once you have adjusted to that perfect angle, lie down in the hammock with your head and feet lined up with the two trees. To get into your sweet spot, move your head to one side of the tree that it is closest to, and your feet to the other side of the tree that they are closest to. You should now be diagonal in your hammock. By doing so you will be flattening out in the hammock – and no longer resembling a banana at all!
Once your angles are correct, and you are lying diagonally in your hammock, you should be able to roll onto your side for side-sleeping, since you will be more flattened. Many have found that they are even able to sleep on their bellies. It just takes time and practice to get your hammock into the position that makes you most comfortable. But once you find that spot you’ll know why so many are “leaving the ground!”
Hammock Stand
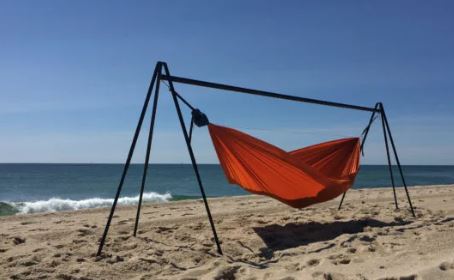 For ultra-flexibility various manufactures makes portable stands from which to hang your hammock. These metal frames fold up for storage when not in use, but can be easily carried and quickly assembled. They are designed perfectly for hammocks so you don’t have to worry about tree branches, tree heights, or even tuning in to that 30° angle.
Picture here is the Tato Gear Hammock Stand.
Not only are stands perfect for the beach, picnic, or around the campfire, but they can even be set up indoors – sometimes in a motel room! Traveling for business just became more fun!
Creative Hanging
 One of the advantages of hammocks is their ability to be hung in various locations. I have slept in situations where tenting would be impossible. For example, a steep hillside offers no refuge for a tent. However, a level hang can easily be accomplished between two nicely-spaced trees. Rolling over in your tent onto jutting rocks and roots can make sleeping on the ground difficult and painful. However, they have no effect on the hammocker, nestled high above them. Or, imagine falling asleep to the sounds of a small stream flowing beneath you with your hammock stretched across it.
Toss your hammock into your gear bag and take it along on your next bike trip. With a little imagination you might find that perfect hang along the path. Even a single tree with a strong, single branch extending horizontally offers a possible resting area if the branch is low enough. Or, a single tree with two sturdy branches may also offer a nesting area.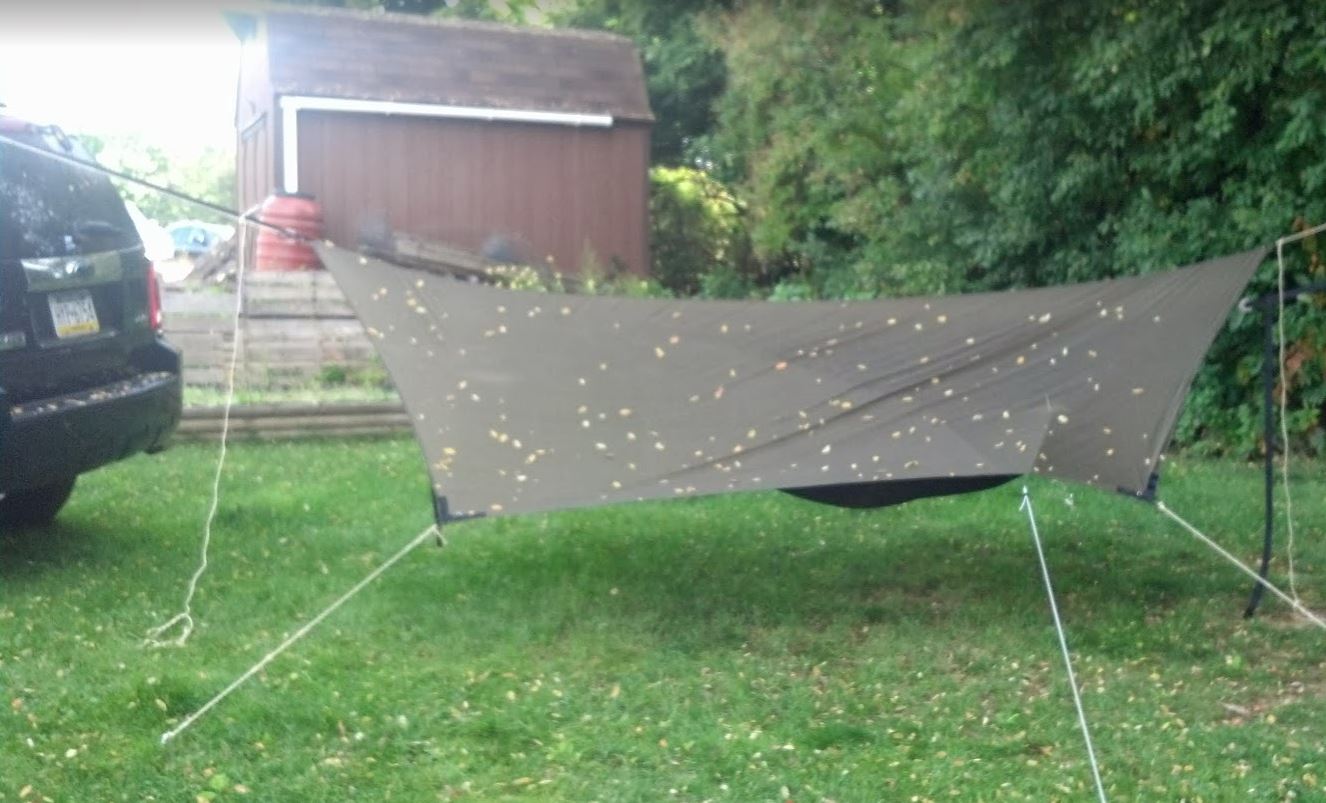
A tree and a car also can be combined for a good hang (or two cars!). I’ve attached my hammock to a tree in my yard and the luggage rack of my SUV to run backyard tests. It pays to be creative!
Patience and Practice
I didn’t hang my hammock correctly the first time – or even the second. It took a few attempts to get it right. Don’t become discouraged! Practice it a few times in your backyard if you can before venturing out on the trail. Don’t give up. As soon as you find your sweet spot you will realize while so many people enjoy sleeping outdoors this way!
Dane Cramer is a backpacker, follower-of-Jesus blogger, jail chaplain, amateur filmmaker, Podcast host, and author of two books: Romancing the Trail and The Nephilim: A Monster Among Us , and has worked as an investigator for over 34 years.